
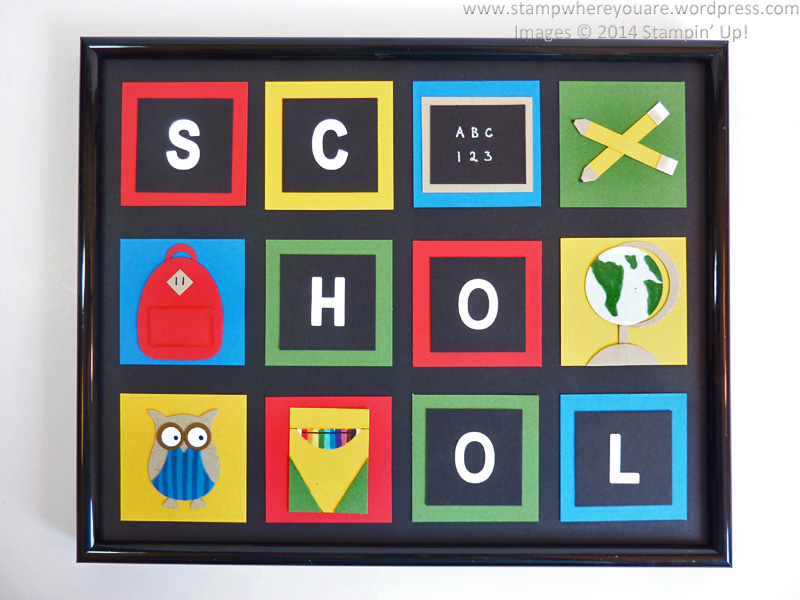
My goodness has this summer just flown by. Some schools around here have been back in session for a week and half already! So by that metric, I suppose this project is a bit on the late side…but since most schools aren’t open quite yet, I’m going to file this one in the “timely enough” file.
This project is one that I really enjoyed creating and I think it would make a fun teacher gift.

I’m going to spread this project out over the next few posts because it uses punch art and some of these need tutorials.
To get you started, the overall materials:
- 8×10″ frame
- Basic Black paper, cut to 8×10″ size
- Three 2″ squares each in Real Red, Crushed Curry, Pacific Point, and Garden Green
- Six 1.5″ squares Basic Black
- Little Letters Thinlit dies
- Whisper White paper for die-cut letters
Today’s tutorials are for the first two embellishments: the chalkboard and the pencils. This is quite image heavy, so these will be under the cut.
First off, let’s do one of the easiest pieces of the whole project – the chalkboard.

 It’s simple as can be. You need:
- 1-1/2″ x 1-1/4″ rectangle of Basic Black
- 1-3/4″ x 1-1/2″ rectangle of Crumb Cake
- White gel pen
Adhere the black rectangle to the brown rectangle. Add the letters and numbers with a white gel pen. Easy peasy.
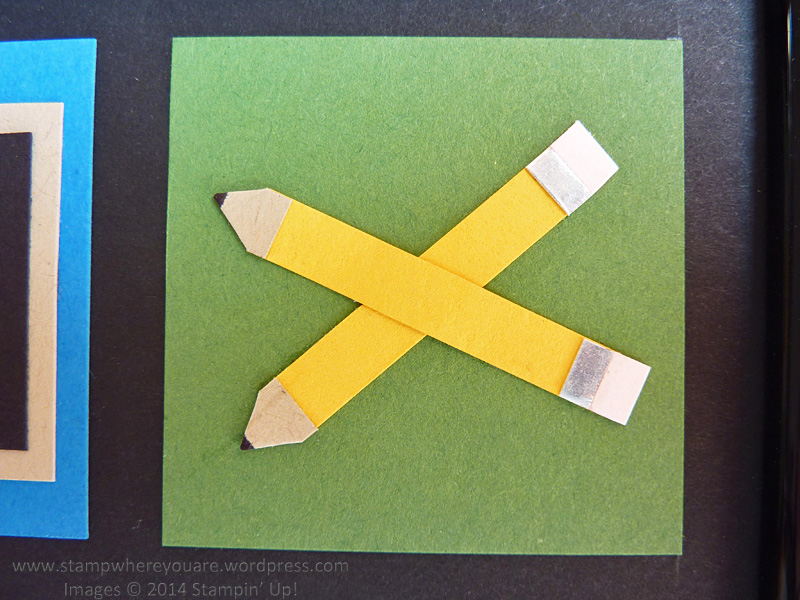
Next up are the pencils. These are a bit trickier.

To start, you need:
- Crushed Curry, cut to 1-3/4 x 3/4″
- Blushing Bride, cut to 3/4″ x 1/4″
- Crumb Cake, cut to 3/4″ x 1/4″
- Silver Foil Sheet, cut to 3/4″ x 1/8″
- Basic Black Stampin’ Write Marker
- Triangle Punch
- Paper Snips scissors
- Tombo Liquid Multipurpose glue
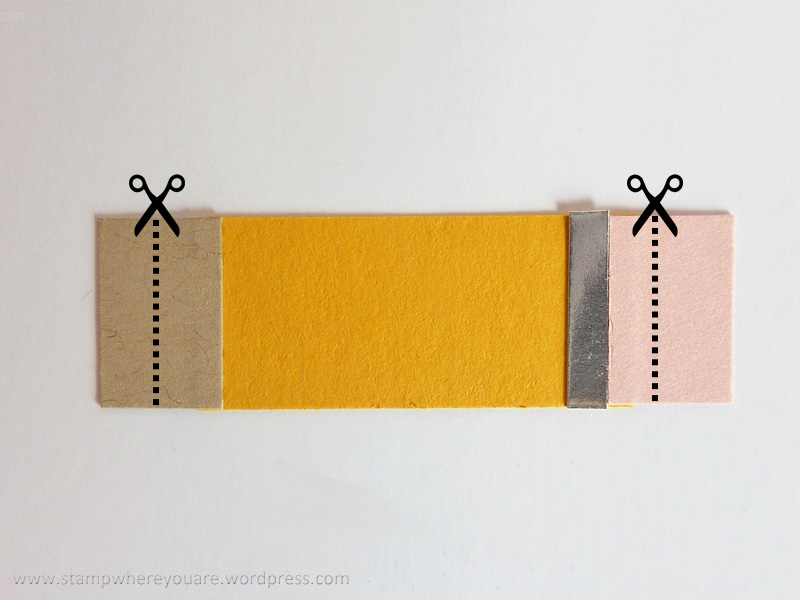
First, adhere the Blushing Bride and Crumb Cake rectangles to either end of the Crushed Curry rectangle with just a tiny bit of overlap. (about 1/8″.) Then trim off the excess Blushing Bride and Crumb Cake as it is easier to trim off the excess than cut such tiny pieces accurately. Adhere the silver foil beneath the Blushing Bride.

Then add a small line of black across the end with the Crumb Cake, this is the pencil lead. Cut the pencil into thirds, each about 1/4″ wide. (I used only two pencils in my frame, but you could use all three if desired.)

From bottom of punch, insert the “lead” end of the pencil into the triangle punch. Punch. This creates the sharpened appearance of the pencils.
I’m new to making photo tutorials. Did I miss any steps? Is there any step that needs more detail or is confusing? Let me know in the comments!


So, so, so fun! I WILL be making one of these frames. Thanks for writing and illustrating detailed instructions. Looking forward to the rest of them.
Pingback: Spooky – Home Decor Frame | Stamp Where You Are